Mastering Breaded Chicken Cutlets: Crispy, Juicy, Perfect Every Time
There are few dishes as universally beloved and satisfying as a perfectly executed breaded chicken cutlet. Crisp on the outside, incredibly juicy on the inside, and bursting with flavor, these culinary marvels are a staple in kitchens worldwide. Whether you’re crafting a quick weeknight dinner, assembling an epic sandwich, or preparing a special weekend feast, mastering the art of
breaded chicken cutlets is a culinary superpower that promises delicious results every single time. Forget dry, bland, or soggy chicken – this comprehensive guide will equip you with all the tips and tricks you need to achieve golden-brown, flavorful perfection.
Understanding the Foundation: What Are Chicken Cutlets?
Before we dive into the delicious details, let's clarify what exactly a chicken cutlet is. A chicken cutlet begins its life as a boneless, skinless chicken breast. What transforms it into a "cutlet" is its preparation: the breast is either carefully sliced horizontally into thinner pieces or, more commonly, pounded with a mallet to create a uniformly thin, flat shape. This crucial step ensures rapid and even cooking, resulting in wonderfully tender chicken that's less prone to drying out.
It's important to distinguish cutlets from chicken tenderloins. While both are lean and cook quickly, tenderloins are naturally occurring, long, thin muscles found beneath the chicken breast. Cutlets, on the other hand, are derived from the whole breast, offering a larger, more versatile canvas for your culinary creations. Their uniform thickness makes them ideal for pan-frying, ensuring every bite is cooked to perfection.
The Art of Preparation: From Breast to Breading-Ready
The journey to perfect
breaded chicken cutlets begins long before they hit the hot oil. Meticulous preparation ensures a tender, juicy result with a crust that adheres beautifully.
Pounding for Perfection
This step is non-negotiable for achieving truly stellar results.
- Start with a Clean Surface: Place your chicken breasts on a clean cutting board. For easier cleanup and to prevent cross-contamination, you can place them between two sheets of plastic wrap or in a large zip-top bag.
- Achieve Uniform Thinness: Using a meat mallet, rolling pin, or even a heavy-bottomed pan, pound the chicken breasts until they reach a uniform thickness, typically about 1/4 to 1/2 inch. Focus on the thicker parts first, working your way outwards.
- Why it Matters: Pounding ensures that the chicken cooks quickly and evenly, preventing one part from drying out while another is still cooking. It also tenderizes the meat, making for a more pleasant eating experience.
Seasoning Beyond the Surface
While the breading provides a significant flavor punch, don't neglect seasoning the chicken itself. Before you even think about flour, generously season both sides of your pounded cutlets with salt and freshly ground black pepper. This foundational seasoning enhances the chicken's natural flavor and ensures that every layer contributes to the overall deliciousness. Some cooks also like to add a pinch of garlic powder or onion powder directly to the chicken.
Crafting the Ultimate Crust: The Breading Process
The breading is the heart of any great
breaded chicken cutlet, providing that irresistible crispy exterior. The classic three-step dredging process is essential for maximum adhesion and texture. Set up your "dredging station" with three shallow dishes or bowls:
-
Flour: The Adhesion Layer
- Purpose: The flour creates a dry surface on the chicken, allowing the egg wash to adhere more effectively. It acts as a crucial "glue" between the chicken and the subsequent layers.
- Preparation: Use all-purpose flour. For an extra layer of flavor, season your flour with salt, pepper, garlic powder, or a pinch of paprika.
- Technique: Dredge each cutlet thoroughly in the seasoned flour, ensuring it’s completely coated. Shake off any excess.
-
Egg Wash: The Binder
- Purpose: The egg wash acts as the primary adhesive, helping the breadcrumbs stick to the floured chicken.
- Preparation: Whisk 1-2 large eggs with a tablespoon or two of milk or water. A dash of hot sauce or Dijon mustard can also be added for subtle flavor. Season lightly with salt and pepper.
- Technique: Dip each floured cutlet into the egg wash, allowing any excess to drip off.
-
Breadcrumbs: The Flavor and Texture Powerhouse
- Purpose: This is where the magic happens – the breadcrumbs create the signature crispy, golden crust.
- Types:
- Panko Breadcrumbs: These Japanese-style breadcrumbs are coarser and flakier, absorbing less oil and resulting in an exceptionally light and crispy texture. They are often favored for their superior crunch.
- Standard Breadcrumbs: Finer in texture, these provide a more traditional, dense crust.
- Preparation: This is your opportunity for maximum flavor! The reference suggests thyme and lemon zest, which is a fantastic combination. Expand on this with options like:
- Italian seasoning, garlic powder, and grated Parmesan for a classic Italian profile.
- Dried oregano, red pepper flakes for a subtle kick.
- Smoked paprika and a touch of cayenne for a smoky, spicy note.
- Minced fresh herbs like parsley or cilantro with lime zest for a brighter, fresher taste.
Make sure to mix your chosen seasonings thoroughly into the breadcrumbs. For more ideas on enhancing the flavor of your crust, check out The Ultimate Breaded Chicken Cutlets: Flavor & Serving Ideas.
- Technique: Press each egg-dipped cutlet firmly into the seasoned breadcrumbs, ensuring every surface is completely coated. Gently press the breadcrumbs onto the chicken to help them adhere.
Pro Tip: After breading, let the cutlets rest on a wire rack for 10-15 minutes. This allows the breading to set, making it less likely to fall off during frying.
Frying to Perfection: The Golden Rule
Now for the moment of truth – frying your beautifully breaded chicken cutlets. This stage requires attention to detail to ensure they are crispy, juicy, and never soggy.
Choosing the Best Fry Oil
The right oil is crucial for achieving that desirable golden-brown crust without burning.
- High Smoke Point Oils: Opt for oils with a high smoke point that can withstand higher temperatures without breaking down or imparting off-flavors. Excellent choices include: canola oil, corn oil, sunflower oil, vegetable oil blends, or grapeseed oil.
- Why Not Olive Oil? While delicious for dressing salads, standard olive oil has a lower smoke point, meaning it can burn easily when heated to the temperatures required for pan-frying chicken. If you prefer its flavor, consider mixing it with an equal amount of a high smoke point oil, or opt for light/refined olive oil which has a higher smoke point.
The Frying Process
- Heat the Oil: Pour about 1/2 inch of your chosen oil into a large, heavy-bottomed skillet over medium-high heat. Allow the oil to heat thoroughly until it shimmers and a flicked breadcrumb sizzles immediately upon contact.
- Don't Crowd the Pan: This is perhaps the most critical rule for crispy results. Frying two cutlets at a time is usually ideal for a standard skillet. Crowding the pan lowers the oil temperature dramatically, leading to soggy, greasy chicken.
- Cook Until Golden: Fry the cutlets for 3-4 minutes per side, or until they are deeply golden brown and cooked through. The internal temperature should reach 165°F (74°C). The thinness of the cutlets means they cook quickly, so watch them closely. For more on preventing soggy bites, refer to Easy Breaded Chicken Cutlets: Crispy & Juicy, No More Soggy Bites.
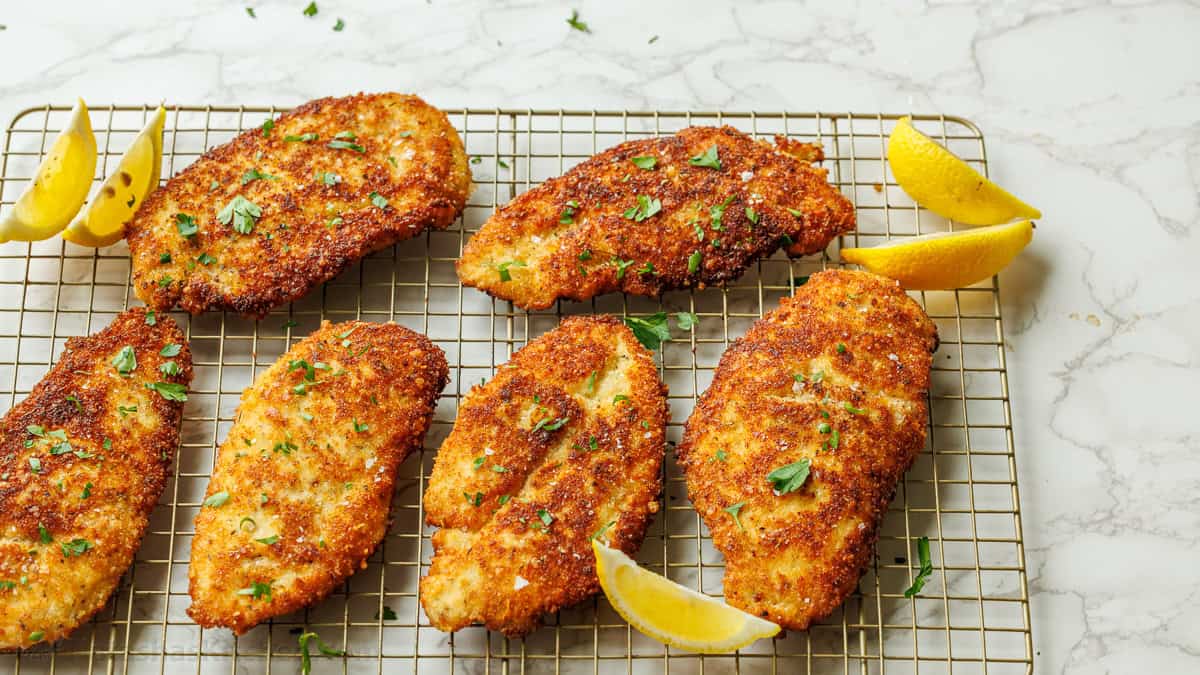
- Drain Properly: Once cooked, transfer the cutlets to a wire rack set over a baking sheet lined with paper towels. This allows excess oil to drain away, preventing the bottom from becoming soggy and maintaining crispness.
Serving Suggestions & Leftover Love
The versatility of perfectly cooked
breaded chicken cutlets is one of their greatest assets.
Creative Serving Ideas
- Classic Main Dish: Serve simply with a squeeze of fresh lemon, a side of roasted broccoli rabe, and a vibrant Caesar potato salad.
- Elevated Sandwich: Build epic chicken cutlet sandwiches on crusty bread with fresh mozzarella, roasted red peppers, and a drizzle of balsamic glaze.
- Chicken Parm Heroes: Top with marinara sauce and melty mozzarella cheese, then broil until bubbly for an irresistible "parm hero."
- Main-Course Salad: Slice the crispy chicken into strips and toss with chopped romaine lettuce, diced tomatoes, defrosted corn kernels, and a simple vinaigrette for a hearty and satisfying salad.
- Kid-Friendly Favorite: Serve with a side of mac and cheese or sweet potato fries for a meal that pleases even the pickiest eaters.
Storing and Reheating for Optimal Crispness
Leftover
breaded chicken cutlets are just as delicious, whether enjoyed cold, at room temperature, or reheated.
- Storage: Store any leftovers in an airtight container in the refrigerator for up to four days.
- Reheating: To restore their crispiness, avoid the microwave. Instead, preheat your oven to 400°F (200°C) and place the cutlets on a wire rack set over a baking sheet. Heat for about 10 minutes, or until warmed through and re-crisped. An air fryer is also an excellent tool for reheating, offering fantastic results in just a few minutes.
Conclusion
Mastering
breaded chicken cutlets is a culinary skill that truly pays dividends. By understanding the nuances of pounding the chicken, expertly seasoning each layer of the breading, and employing proper frying techniques, you can consistently achieve results that are crispy, juicy, and bursting with flavor. With these tips and tricks in your back pocket, you're now ready to transform simple chicken breasts into an unforgettable meal, guaranteeing perfection every single time. Get ready to impress your family and friends with your newfound expertise!