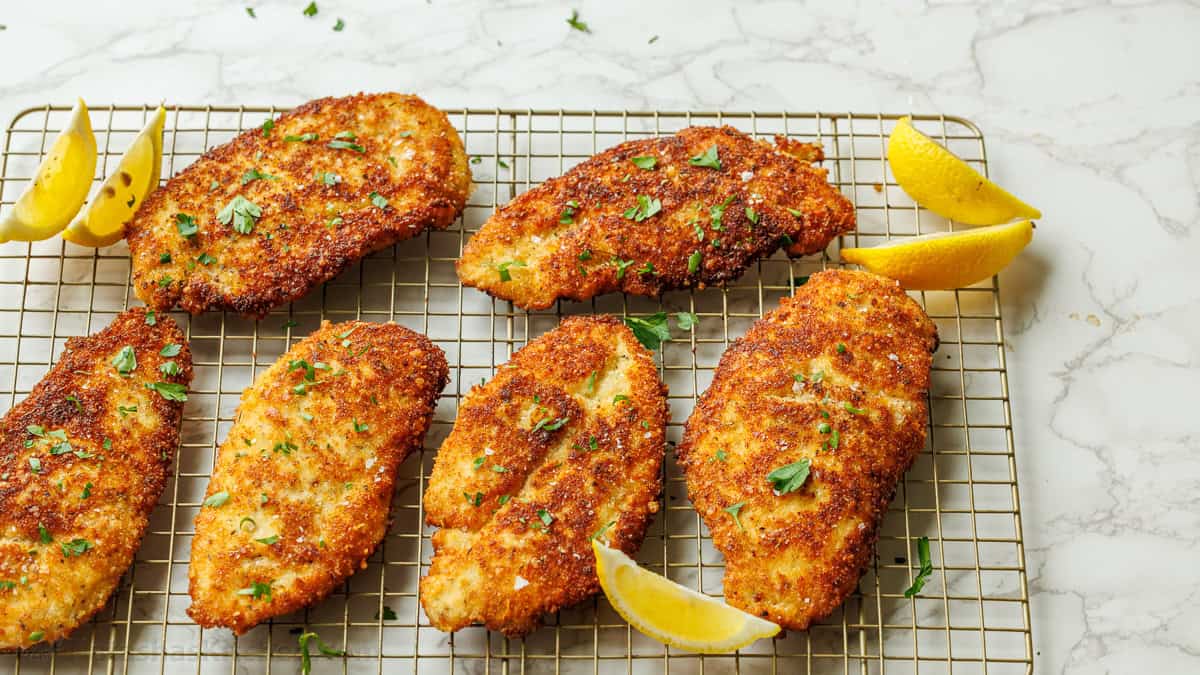
Unlock the Secret to Perfect Breaded Chicken Cutlets: Crispy & Juicy, Every Time!
Are you tired of lackluster, soggy chicken? Do you dream of perfectly golden, irresistibly crispy breaded chicken cutlets that are tender and juicy on the inside? You're not alone. Many home cooks struggle to achieve that coveted restaurant-quality crunch without drying out the chicken. But what if we told you that mastering the art of the breaded chicken cutlets is easier than you think? With a few expert tips and tricks, you can banish soggy bites forever and create a dish that will become a go-to favorite for speedy weeknight meals or impressive weekend feasts.
This comprehensive guide will walk you through everything you need to know, from understanding what makes a great chicken cutlet to the precise techniques for breading and frying like a pro. Prepare to impress even the pickiest eaters with chicken that's guaranteed to please!
What Exactly Are Chicken Cutlets? The Foundation of Crispy Perfection
Before we dive into the cooking process, let's clarify what a chicken cutlet actually is. Essentially, a chicken cutlet begins its life as a boneless, skinless chicken breast. The key transformation lies in preparing it to be uniformly thin and flat. This can be achieved in one of two ways:
- Pounding: Using a meat mallet, rolling pin, or even a heavy-bottomed pan to pound the chicken breast to an even, thin thickness (usually about 1/4 to 1/2 inch).
- Slicing: Carefully slicing a thicker chicken breast horizontally through the middle to create two thinner pieces.
This uniform thinness is crucial for several reasons. Firstly, it ensures that the chicken cooks quickly and evenly, preventing one part from drying out while another is still undercooked. Secondly, it creates a larger surface area, perfect for maximizing that delicious, crispy breading. While often compared to chicken tenderloins, cutlets are distinct: cutlets are whole breast meat prepared thin, while tenderloins are naturally thin, distinct muscles found beneath the breast.
The Secret to Crispy, Juicy Breaded Chicken Cutlets: Pro Tips Revealed
Achieving that perfect golden crust and succulent interior isn't magic; it's a science. Here are the professional secrets that will elevate your breaded chicken cutlets from good to absolutely glorious:
The Crucial Step: Pounding for Uniform Thickness
This is arguably the most important foundational step for perfectly cooked, juicy chicken cutlets. Chicken breasts are naturally thicker at one end and taper down, creating an uneven surface. Without pounding, you'll end up with parts of the chicken drying out while others are still cooking.
- Why it matters: Pounding ensures even cooking from edge to edge, resulting in uniformly tender and juicy chicken. It also reduces cooking time significantly.
- How to do it: Place your chicken breasts between two pieces of plastic wrap or in a large zip-top bag. Using a flat meat mallet, the bottom of a heavy skillet, or a rolling pin, pound the chicken until it's about 1/4 to 1/2 inch thick throughout. Focus on the thicker parts first, working your way out.
- Bonus tip: Don't over-pound! You're aiming for even thickness, not pulverizing the chicken.
Crafting Your Flavorful Breading Mixture
The breading isn't just for crispiness; it's a huge opportunity to infuse flavor. A standard breading station involves three stages: flour, egg, and breadcrumbs. Each plays a vital role in creating that perfect crust:
- Flour: The initial coating helps to dry the chicken surface, providing a sticky base for the egg wash. Season your flour with salt and black pepper for an extra layer of flavor.
- Egg Wash: A beaten egg (or a couple, depending on quantity) acts as the "glue" that binds the breadcrumbs to the chicken. A splash of milk or water can thin it slightly.
- Breadcrumbs: The star of the show! While plain breadcrumbs work, consider Panko breadcrumbs for an extra-crispy texture. This is where you can get creative with seasonings.
Flavor Customization: While the classic combination of dried thyme and lemon zest offers a bright, versatile flavor, don't stop there! Experiment with:
- Italian flair: Dried oregano, garlic powder, onion powder, and grated Parmesan cheese.
- Smoky heat: A pinch of smoked paprika and red pepper flakes.
- Herbaceous delight: Finely chopped fresh parsley or a mix of Italian herbs.
- Asian twist: A touch of ginger powder and white pepper.
Remember to season each layer – the flour, the egg wash, and especially the breadcrumbs – for maximum impact. For more specific flavor profiles and pairing ideas, explore The Ultimate Breaded Chicken Cutlets: Flavor & Serving Ideas.
The Art of Frying: Avoiding a Soggy Disaster
This is where many home cooks falter, leading to greasy, soggy breaded chicken. The key is maintaining optimal oil temperature and not overcrowding the pan.
- Don't Crowd the Pan: This is a golden rule! Frying too many cutlets at once drastically lowers the oil temperature. Cold oil means the breading absorbs more grease instead of becoming crispy, resulting in a soggy, oily crust. Aim to fry only two, maybe three, cutlets at a time, depending on your pan size. Give them space!
- Proper Oil Temperature: The oil should be hot enough (around 350-375°F or 175-190°C) to immediately create a crust, but not so hot that it burns the breading before the chicken cooks through. You can test a small pinch of breadcrumb; it should sizzle immediately.
- Cooking Time: Because cutlets are thin, they cook quickly. Typically 3-4 minutes per side, until golden brown and the internal temperature reaches 165°F (74°C).
Choosing the Best Oil for a Golden Crisp
The type of oil you use for pan-frying your breaded chicken cutlets matters significantly. You need an oil with a high smoke point.
- Recommended Oils: Corn oil, blended vegetable oil, canola oil, sunflower oil, or grapeseed oil are all excellent choices. They can withstand the high heat required for frying without burning or imparting off-flavors.
- Oils to Avoid (or use carefully): Olive oil, especially extra virgin olive oil, has a lower smoke point. If used on its own for pan-frying, it can burn easily, creating unpleasant flavors and potentially harmful compounds. If you prefer the flavor of olive oil, mix it with an equal amount of high smoke point oil like canola or vegetable oil.
Beyond the Pan: Creative Ways to Serve Your Crispy Cutlets
Once you've perfected your crispy, juicy breaded chicken cutlets, the serving possibilities are endless. They're incredibly versatile and can be the star of many different meals:
- Classic Dinner: Pair them with vibrant sides like garlicky broccoli rabe, a fresh Caesar salad, or a creamy potato salad.
- Delectable Sandwiches: Transform them into gourmet chicken sandwiches. Think toasted brioche buns, fresh mozzarella, roasted red peppers, a drizzle of balsamic glaze, and peppery arugula. Or go for a chicken parm hero with marinara and melted mozzarella.
- Main-Course Salads: Slice the crispy chicken into strips and toss them with crisp romaine lettuce, diced tomatoes, sweet corn kernels, red onion, and your favorite vinaigrette for a satisfying and flavorful salad.
- Family Favorite: Cut into strips and serve with a variety of dipping sauces for a homemade chicken "finger" experience that far surpasses any fast-food version.
Storing and Reheating for Continued Enjoyment
Sometimes, despite your best intentions, you'll have delicious leftovers. Good news: breaded chicken cutlets are just as enjoyable the next day, hot, cold, or at room temperature!
- Storage: Store cooled cutlets in an airtight container in the refrigerator for up to four days.
- Reheating for Crispness: To revive that delightful crunch, avoid the microwave, which tends to make breading soggy. Instead, place the cutlets on a wire rack set inside a baking sheet. Reheat in an oven preheated to 400°F (200°C) for about 10 minutes, or until heated through and crispy. The wire rack allows air to circulate around the cutlets, preventing sogginess.
Your Journey to Perfect Breaded Chicken Cutlets Starts Now!
No more settling for less! With these expert tips on pounding, seasoning your breading, frying correctly, and choosing the right oil, you're now equipped to create truly outstanding breaded chicken cutlets. This easy recipe promises not just crispy exteriors and juicy interiors, but also the satisfaction of mastering a classic. So grab your chicken, gather your ingredients, and get ready to enjoy the best breaded chicken cutlets you've ever made!
